
HAZOP Administration Guide
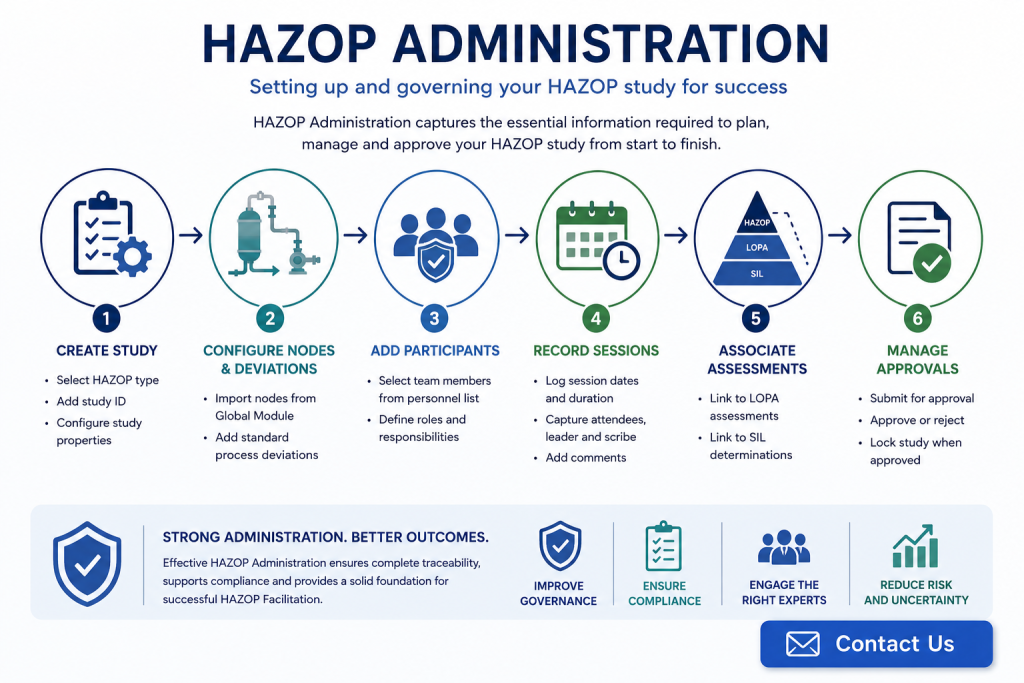
HAZOP Administration provides the foundation for a successful Hazard and Operability (HAZOP) study. Before facilitation begins, administrators must configure the study, assign participants, prepare process nodes and establish the governance needed to manage approvals and associated risk assessments.
Within the Mangan Software Solutions SLM platform, HAZOP Administration centralises study setup, participant management, session recording and approval workflows. This guide explains each stage of HAZOP Administration and how it supports efficient, repeatable HAZOP studies across your organisation.
What Is HAZOP Administration?
HAZOP Administration is the process of preparing and managing a HAZOP study before, during and after facilitation. It includes creating studies, configuring nodes, assigning participants, recording workshop sessions and managing approvals.
Good HAZOP Administration ensures studies follow a consistent structure while providing complete traceability throughout the process safety lifecycle.
- Create HAZOP studies
- Configure study properties
- Manage participants
- Record workshop sessions
- Control approvals and governance
To learn how these administration activities support the wider study workflow, see the HAZOP Facilitation Guide.
HAZOP Administration: Creating a HAZOP Study
HAZOP Administration begins with creating a new HAZOP study. During setup, administrators define the study type, select the appropriate process unit and configure the initial study properties.
SLM allows organisations to create:
- New HAZOP studies
- Projects
- HAZOP revalidations
- Studies of record
Existing nodes and predefined process deviations can be imported automatically from the Global Module, allowing facilitators to begin the study with a consistent structure.
Configuring Nodes and Standard Deviations
Effective HAZOP Administration relies on well-defined process nodes and standard deviations. Nodes represent sections of the process, while predefined deviations provide the basis for identifying hazardous scenarios.
Administrators can configure nodes within the Global Module before the study begins, allowing them to be reused across multiple HAZOP studies.
Risk evaluation within those studies depends on an accurately configured risk matrix. Learn more in the Configuring a Risk Matrix guide.
Managing Participants in HAZOP Administration
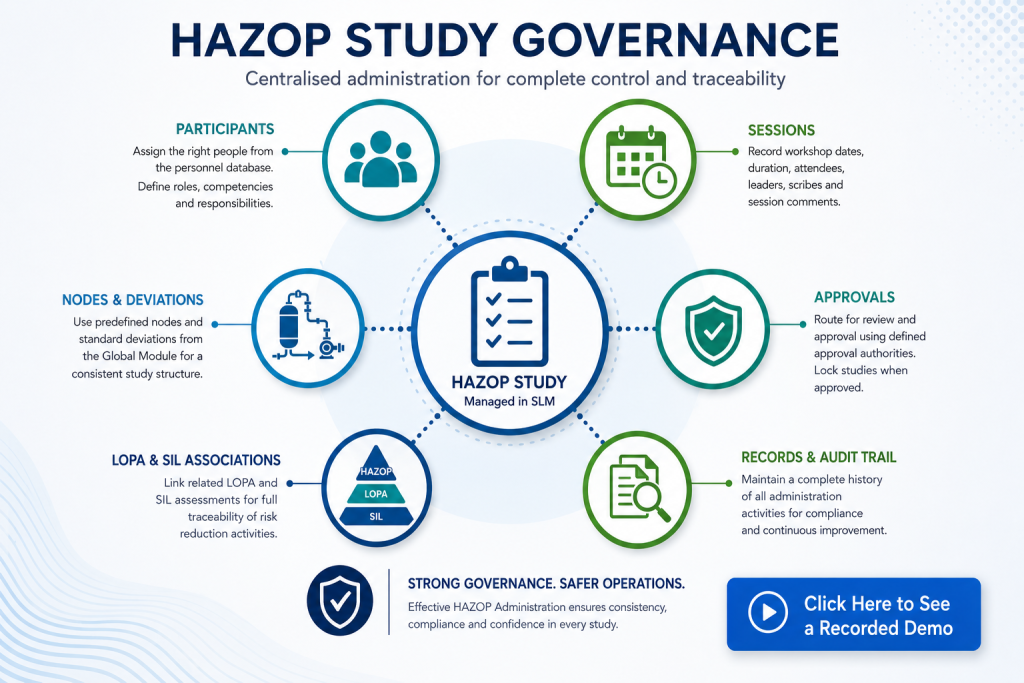
HAZOP Administration includes assigning the multidisciplinary team responsible for completing the study. Personnel are made available from the SLM Global Module and can then be selected as study participants.
Typical participants include:
- HAZOP facilitator
- Process engineer
- Operations representative
- Maintenance specialist
- Instrumentation engineer
- Safety representative
Using a central personnel database helps ensure participant roles, competencies and approval authorities remain consistent across every HAZOP study.
Recording HAZOP Sessions
Each HAZOP workshop session should be recorded to provide a complete history of the study. HAZOP Administration allows administrators to document session dates, durations, attendees, facilitators, scribes and workshop comments.
Maintaining detailed session records supports:
- Regulatory compliance
- Audit requirements
- Project reporting
- Workshop traceability
- Knowledge retention
Session records become part of the permanent HAZOP study documentation within SLM.
Linking LOPA and SIL Assessments in HAZOP Administration
Some HAZOP scenarios require further analysis using Layer of Protection Analysis (LOPA) or SIL determination methods. HAZOP Administration allows studies to be linked directly with related assessments.
These associations improve traceability between hazard identification and subsequent risk reduction activities while reducing duplicated data entry.
Learn more about Layer of Protection Analysis in the LOPA Facilitation Guide.
Managing HAZOP Approvals
Once HAZOP Facilitation has been completed, authorised reviewers can approve the study using the standard SLM approval workflow.
Approval management includes:
- Assigning approvers
- Submitting studies for approval
- Approving or rejecting studies
- Escalating approvals where required
- Locking completed studies against further editing
Only personnel with the appropriate approval authority can complete this stage, ensuring robust governance and auditability.
HAZOP Administration Best Practices
Successful HAZOP Administration provides the foundation for efficient HAZOP Facilitation and consistent study governance.
- Create standard study templates.
- Maintain accurate personnel records.
- Configure reusable nodes and deviations.
- Record every workshop session.
- Associate related LOPA and SIL studies where appropriate.
- Complete approvals only after facilitation has finished.
- Review study information before final sign-off.
For recognised industry guidance on HAZOP methodology and study governance, visit the AIChE Center for Chemical Process Safety (CCPS).
Effective HAZOP Administration improves consistency, strengthens governance and ensures every HAZOP study is fully documented from creation through approval.
If you are looking for a complete solution for managing HAZOP studies, approvals and associated process safety workflows, explore the MSS HAZOP Software.
HAZOP Administration
0:06
Welcome to this application Explainer video, part of our HAZOP topic range.
0:10
In this video, we will cover the subject of administration and approvals within SLM.
0:16
When conducting a HAZOP within the SLM system, users can capture information about the administration and completion of the HAZOP study.
0:24
The following information will be covered in this training Chapter.
0:27
One we HAZOP overview, Chapter 2 will be HAZOP sessions, chapter 3 be HAZOP participants, Chapter 4 will be LOPA association, and Chapter 5 will be HAZOP approvals.
0:44
In Chapter 1, we’ll cover the creation of the HAZOP object, the HAZOP study properties, the different HAZOP types, associating existing nodes, and process deviations.
0:55
Looking in the SLM global module, underneath the units, we can build out nodes, and at the site level we can also populate a preset list of standard process deviations.
1:08
This will be important when we’re facilitating the Hazop and getting things set up so these nodes all exist.
1:15
All of these deviations are already here assigned to the site.
1:19
If we navigate to the HAZOP module and we click on the unit we want to build the HAZOP study under, click on Edit Tools and add Hazop Study.
1:28
Select the HAZOP type.
1:29
Is it of record?
1:30
Is it a project, or is it a reevaluation of an existing HAZOP?
1:35
Let’s add the HAZOP study ID and click next.
1:43
Now in this next page, we’ll be able to select the nodes that already exist from that global module that we just saw.
1:48
And we also have the ability to add standard deviations.
1:52
This will pre populate the HAZOP study with one scenario for each of the different process deviations that are predefined for this site level from the global module.
2:02
As we hit save, the HAZOP study will be populated and created.
2:07
Now that the Hazop study has been created, we can see it populated here in the object tree of the Hazop module.
2:13
With that, you’ll notice all of those nodes are already created from that global setup.
2:19
If we click on the HAZOP nodes, we also have the ability to add an additional node if there was one that was not completed yet.
2:27
Also on the Hazop module, you’ll be able to see from the Facilitation tab the ability to add a node here.
2:34
And again, all of those standard process deviations from that global module are pre populated and filled in.
2:41
So the scenarios themselves are blank, but SLM will pre populate with one scenario for each of the different specific deviations that are available from the global module setup when they’re applied to the HAZOP study.
2:59
In Chapter 2, we will cover how to add participants to a HAZOP study, what participants are available, and things to consider.
3:07
How do participants become available for the study?
3:11
So if we go back to the HAZOP study object here on the administration tab, we can fill in some of the general HAZOP study properties.
3:21
Again, start dates, end dates, comments, and then start to capture the sessions.
3:27
But before we can understand the sessions that are associated, we need to capture who the team participants are.
3:34
Now the SLM system will automatically fill in the available site personnel from the global module setup.
3:40
So here you can see a number of people that are associated from the global module perspective.
3:46
From there we can simply click these people and once we click on them, we can add them as a participant.
3:53
It will automatically then flow them names up into the HAZOP team participants values here.
4:00
Now how you add personnel to the participants is done in our SLM personnel module.
4:05
If you click here on the site level, we can manage the personnel list.
4:11
You can add the individuals by name and when we click on an individual, you can see the the associations, the personal data, and from there understand roles, competencies, and approval authorities.
4:26
So once they’re added to this site level, then in these other modules like the HAZOP, the personnel will be available on a study within that site and you can see those people are now available here.
4:44
In Chapter 3, we’ll cover how to capture the HAZOP sessions and how to add the right participants.
4:51
So now we’ll have a look at the Hazop sessions that are done here on the Administration tab in this table.
4:58
Again, it’s important to have the team participants filled out prior to completing the sessions.
5:03
To log a new Hazop session, we can simply hit the Add New Record button.
5:08
We can specify the date, We can specify the duration.
5:13
Let’s say it took 8 hours.
5:15
We can write a description in here in the comments and then for the attendees, this is a mandatory field for capturing a HAZOP session.
5:25
From here it becomes a checkbox, so if we click on the blank field, it will open up a list of all of the HAZOP team participants and we can add the attendees here.
5:37
From there you can designate from the Dropbox who the leader was and who was the scribe for this.
5:46
We can then add a new record and it adds a new row for us here.
5:51
Let’s say this one was six hours.
5:53
We can fill in descriptions and comments.
5:56
We can add 3 attendees.
5:59
We can choose the leader from here and which one was described.
6:06
So not every single session will have the same values, the same attendees, but SLM allows you to populate that information with the people that were available for those sessions.
6:18
Again, you have to populate the team participants before you can log the HAZOP sessions because these attendees are mandatory.
6:27
Once you’ve got those filled out, you can simply click save and they are now records that are available in the HAZOP Sessions table.
6:34
As part of this HAZOP study.
6:39
In Chapter 4, we’ll cover how to associate the HAZOP with a LOPA or SEAL assessment and things to consider.
6:46
Does your organization use LOPA or Risk Steel graph assessments, and are the related studies populated within the SLM system?
6:55
Let’s now have a look at connecting the SLM HAZOP study with other modules such as LOPA or the Risk Steel graphs.
7:03
On the Administration tab.
7:06
As part of the HAZOP study properties, there’s an associated LOPA study and associated seal assessment fields.
7:13
These allow you to select from a drop down of the existing Lopas or seal assessments that are coming out of the SLM Risk Seal graph module.
7:23
You can simply click these and hit save and that association becomes available.
7:28
Same with the LOPA, we can click a LOPA, hit save and that association becomes available.
7:34
These will only be available and needed if you are using the SLM LOPA study or the SLM Risk Seal Graph modules in here.
7:47
In Chapter 5, we’ll cover how to approve the HAZOP study and things to consider.
7:53
Is the SLM system set up to require approvals for Hazops?
7:57
Are the right people authorized to approve a HAZOP within SLM?
8:01
Let’s now look at the approval of the HAZOP study.
8:05
This is to take place after the facilitation is complete, but there is essentially a tab here on the HAZOP study that is for the HAZOP study approvals.
8:16
You can simply go through the same approval process that you’ll see throughout the whole SLM system for different workflows and events.
8:23
We can add an approver, we can select who’s available for these.
8:27
The people that are designated as approvers have to be set up as approvers in the SLM system in the global module.
8:35
Once we save that the approval is submitted to this person, they can then come into the SLM system, self approve, approve, disapprove, escalate, whichever option is required.
8:47
But it’s the same workflow that you’ll see throughout the SLM system.
8:51
And then from there, they can submit it and approve it.
8:55
This is again to take place after the facilitation is done.
8:59
If you approve this HAZOP study, the facilitation tab will be locked for editing.
9:03
The whole HAZOP will be considered complete.
9:06
So you want to make sure that you’ve fully facilitated and completed your HAZOP prior to going through the approval process.


